What is more fun than an enormous, creepy-crawly-cute ladybug? This pacifier clip is perfect for either baby girls or boys, and knits up in only a few hours. Although the skills involved are pretty basic, it does take a good eye to put this fuzzy insect together, so keep in mind this is an intermediate-level project.

Because this is a yarn stash-busting project, you can use any of those small balls of leftover yarn to make it. You could even make a purple ladybug on an orange stem.

This pattern is free for personal use, but I do request that you not make these to sell. Please let me know if you have any questions or find any errors in this pattern. I really look forward to seeing some feedback!

Size: 6.5 inch pacifier clip. If you want it longer, knit the I-cord on the stem longer. Gauge is not very important in this project.

Materials:

  • Small amounts of yarn in red, green, black and cream. Red should be sock or dk weight, green, black and cream work better with worsted weight yarn.
  • One suspender clip, ¾ in. size. These are available from http://www.etsy.com/shop/PacifierClipSupplies
  • 1 small (1 cm. – ¼ in.) green button

Tools:

  • Set of three double-pointed needles, US Size 3
  • Yarn needle
  • Scissors
Make Stem:

Cast on 4 stitches with green.

Row 1-2: knit

Row 3: k3, pass 2nd stitch over 3rd, k1, pass 2nd stitch over 4th. 2 stitches remain with a hole of two stitches.

Row 4: k1, m2, k1. You have just formed the button hole!


Knit even until piece measures 2 inches.

Next row: k1, k2tog, k1. 3 stitches remain. Do not turn. Work across these three stitches to form I-cord.

Knit I-cord for 9 inches.

Increase to attach pacifier clip: k1, (m1, k1) 2 times. 5 stitches.

If yarn is very lightweight, work one more row k1, m1, k3, m1, k1. 7 stitches.

Cut yarn, leaving tail of 6 inches. Thread tail through yarn needle and securely sew live stitches to the clip using a figure-eight motion. Tie off in back of clip, and pull remaining yarn up through the stem to hide the tail.


Make Ladybug:

Cast on 6 stitches in red, divide onto two needles. Join to work in the round.

Row 1: On each needle, k1, (m1, k1)x2. 10 stitches total.

Row 2 and all even rows: knit

Row 3: On each needle, k1, (m1, k1)x4. 18 stitches total.

Row 5: On each needle, k2, m1, k3, m1, k2, m1, k2. 24 stitches total

Rows 6-12: knit

Row 13: On each needle (k2, k2 tog)x3

Row 14: knit

Row 15: On each needle (k1, k2tog)x3. Cut red yarn

Loosely wind spare yarn (red or black) around two fingers approx 15 times to create stuffing for ladybug. Cut yarn and stuff body.

Row 16: With black, knit all 12 stitches.

Row 17: On each needle, k1, ssk, k2tog, k1

Row 18: knit

Row 19: On each needle, ssk, k2tog

Cut yarn with ~36 in long tail and graft stitches together with kitchener stitch.

Embroidery:

Prod ladybug body into rounded shell on top with flatter ventral (under) side.

Draw long tail from grafting stitches into the ladybug head, come out in middle back of bug. Form a straight line down to the end of the shell.

Spots: Embroider spots with French knots, following pattern of ladybugs. I made a 13-spotted ladybug in the sequence of 2:4:4:3, but you can make any pattern you’d like.

Antennae: Draw yarn out to left front of head and back around 1 stitch to create a loop. Hand-chain 5 stitches tightly to create antennae, loop yarn three times through last loop and pull tightly. With needle, thread tail down through chained stitches and back into head. Repeat on the right front side of head.

Legs: Make six legs in the same manner as antennae. Front legs are placed right at the join between red and black, chaining 7 stitches long. Middle legs are 9 stitches long. Back legs are 12 stitches long, and point to the back instead of front.

Face: With white, embroider pattern on thorax (black part of body), following photos.

Finishing:

With the stem, form a loop and position ladybug on loop. Sew tips of legs to the stem, the two front right legs to the loop, the back left leg to the bottom of the stem, and the top left leg to the top of the stem if needed. The key with positioning the ladybug is to make sure you don’t twist the stem. Hold the pacifier clip up to check that the clip hangs straight. Sew the stem down to the middle of the body of the ladybug.

Attach button to the back side of the garter-stitch portion of the clip. Button clip around pacifier, and you’re finished! Clip to your favorite baby and let them go!


This Saturday was my first show, at the Indiana Christian Childbirth Expo, conveniently located at our church. It was a good first show, small enough to keep the pressure low, but big enough that I got a good idea of what it would take to set up a booth at a larger arts fair.

This was a very good experience. It pushed me to create nicer business cards, write special order forms and receipts, design a new line of pacifier clips, and come up with creative display ideas. Do you like the hats stuffed with skeins of yarn perched atop curvy drinking glasses?

Plus, doing the ladybug giveaway was way fun. The clip was won by Michelle, a mom of two beautiful baby girls who survived TTTTS last spring. Right now I'm working on making a second so the twins can match :-).

So what's coming up next? In the next few days I'll be publishing a free pattern so you can make that ladybug clip yourself! I'm going to start publishing patterns from time to time on Ravelry, so if you're a knitter there's something to look forward to. By the way, if you are on Ravelry, you should friend me (MrsCollinHobbs) because I currently have no friends and it makes me look kind of lonely.

Also, I'm hoping to get the Scarborough Fair Collection (colorful, hand-painted window herb garden kits) finished soon because my little herb seedlings are going to be ready for potting soon. If you live in the Bloomington area and are interested in growing herbs, let me know. These will be very reasonably priced because I really love to share fresh food with people. You can't get fresher than clipping parsley, sage, rosemary and thyme and throwing them into your supper! (Not to mention cilantro, dill and basil.)

So much to look forward to. Hope you'll stay tuned!

Because Saturday will be my first show, I wanted to do something fun to encourage people to come check out my stuff. So I knit this ladybug pacifier clip (an entirely original design) and will be holding a drawing to give it away. Stop by my booth at the Chrsitian Childbirth Expo at Church of the Good Shepherd anytime from 1 pm to 5 pm on Saturday, March 27th and I'll enter your name in the drawing!


The ladybug I knit was based off the one in this picture. Do you think it's a good likeness?

I wanted to design a pacifier clip that would work well for either boys or girls, and I think this one combines the cute and creepy-crawly factor just enough to be great for both.

I love how it looks like Annie has a giant bug crawling up her shirt!

Suggested retail: $10.00, but if you stop by the Christian Childbirth Expo this Saturday you might be able to win it for free!

Persian Slipper Set

This Saturday I'll be having a booth at the Christian Childbirth Expo with some of my baby items for sale and on display. Along with the Sunshine and Salsa collection, I've made a number of fun pacifier clips and other small things for sale.


These Persian slippers are knit from Susan B. Anderson's book, Itty-Bitty Nursery. I've got to say, I really love Mrs. Anderson's style, and if I ever publish my own book of knitting designs (still a distant dream at this point) she will have been one of my first inspirations.

Even though I knit the booties slightly larger than the pattern stated, they still are a bit too small for Annie. I think they would be ideal for a 0-3 month baby. They're so soft and warm that even Collin and I wanted a pair. Unfortunately, it was a very time-intensive pattern even for the baby size, so I don't think we're going to get any adult slippers anytime soon.

I really love the butterfly pacifier clip, and I'm sure I'll make more butterflies in other yarns and color combinations. This lovely wool/acrylic yarn was a gift that some of our good friends picked out in Michigan, and the booties used almost all of it up. They're that deliciously thick! I can't describe how nice these feel, you'll just have to come to the expo and touch them yourself.

Suggested retail: $24.00 for the booties, $10.00 for the pacifier clip.

Elvish Shoes

Our good friends, Gandalf (yes that's his real name) and Anna are expecting their first baby in early June. We're very excited to meet their little girl, and I loved designing some booties for them.

I chose the two-strap Mary Jane style of Saartje's Booties for these delicate shoes, and knit it with a grey mohair blend. The white yarn on top was yarn I spun from the fleece of my goats, Euodia and Syntyche.

There they are, on my parent's farm, right after their spring haircut a few years ago. That's Tyche on the left, and Dia on the right - a true shepherd can tell one goat from another. Most people don't get to know the names of the animals their clothes came from!

When I was designing booties for Gandalf and Anna's baby I wanted to include both Anna's quiet beauty (she grew up Mennonite) and also allude to the Lord of The Rings because Gandalf's name was too fun to pass up. Green vines wind freely around the booties, with purple flowers both embroidered and sewn on as buttons.


On the sole of the booties I embroidered Gandalf's signature rune - the one the original Grey Wizard used to mark Bilbo's door so all the dwarves would show up for that unexpected party that started all the adventures. I don't expect that this baby will get tangled up with any dragons, but I do know that her birth is going to mean lots of new adventures in the Farnam family!

Suggested Retail: $20.00


This is another project I made with the lovely yarns I got for Christmas from Yellow Dog Knitting in Eau Claire, WI. I actually finished it back in January, but we only took pictures yesterday because we finally had a sunny day to take pictures.

I totally fell in love with this yarn, Noro Silk Garden Lite, and spent several hours looking for a pattern which could do justice to the beauty of the yarn. I decided on
Little Red Cap, a gorgeous and romantic pattern in the original red and which worked nicely in the rainbow-colored Noro yarn too.


I have a pretty large head (23") so I was afraid that this hat would be too small for me. I tried knitting it on bigger needles right off the bat, and discovered after completing the brim that my enlargement was too big. I started over and knit according to the pattern, and the hat fit perfectly. The only modification I made to the pattern was to knit the inside of the brim with a slightly softer yarn in a matching color. This not only made the hat more comfortable to wear, but it also made the hat start with the nice dark red instead of the weaker yellow.


I was very concerned with whether or not there would be enough yarn to complete the hat, and I even counted up every stitch in the pattern and unraveled a swatch to get a very good estimate of the yardage required. The pattern said that it would take about 173 m. of yarn, my calculations said it would take about 115 m., and it ended up only taking more like 105 m. I was holding my breath the whole time I knit it, and ended up with a very small ball of leftover yarn.


This is my favorite winter hat. It's bright enough to defy the depression brought on by grey skies, but muted enough to be grown-up. The cables and lace are feminine and look complicated in an eye-pleasing way. If I were to make it again, I might consider a different (but still simple) lace motif in the middle of the diamond instead of the eyelet climbing vine, but I think this is pretty sweet the way it is.

I've gotten plenty of compliments from strangers on this hat. My favorite was from a slightly aggressive short young woman in the library who asked, while I was standing in the checkout line,
"Where did you get that hat?"
I replied, "I made it."
She continued: "Where did you get the yarn?"
"From a local shop in Wisconsin, but it's a national brand so I can give you the name of the yarn."
She pulled out a notepad and pencil and said,"Ok, go"
"It's Noro (that's N-O-R-O) Silk Garden Lite"
She made a disappointed face and said, "Oh. I know that yarn. I don't know what I'd do with another hat though. I have like 16."
I suggested, "You could give them to your friends or try selling them on Etsy. You do know Etsy, don't you?"
She started walking away and threw back over her shoulder, "I wouldn't want to do that. If you post your stuff online people steal your ideas!"
What an attitude. Just for the record, dear readers, you are welcome to use my ideas for your own projects. While I'd rather you not make exact copies of my projects to sell on Etsy, one of the main things Etsy customers are paying for is the time and skill of the craftsman, not simply the creative idea.

Suggested retail for this hat: Noro yarn is quite expensive ($11 for a small ball) so this hat would have to cost at least $22 to account for the hours it would take me to knit it.

About Me

My photo
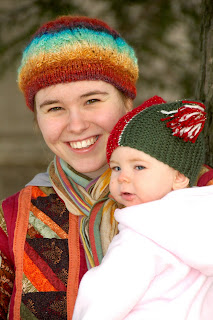
I'm a follower of Jesus Christ, help-mate of Collin, and mother to Annie, Laurel, and Jenny. This blog contains a bit of my fiber arts portfolio. With three young children, I'm currently out of the selling business, but I hope to re-launch this blog in the next few months as a personal fiber-arts blog.

About this blog

This blog contains photos both of things for sale through my crafts business, Seasonal Arts, as well as gifts I make for my family and friends. On most projects I have also posted a suggested retail price. If you see something which catches your eye, feel free to send me an e-mail at:

mama.hobbit.arts[at]gmail.com

I would love to make something for you!

Blog Archive